Parts for one hand:
Arduino Leonardo
Arduino analog joystick
Cheap vr controller
Jumper cables
6x Push Button Switch for Arduino
MPU-6050 6 DOF GY 521
Building
Solder the 6 buttons, one side is a jumper cable the other is a bare

Open the cheap vr controller , and throw it all away! except for the front buttons.

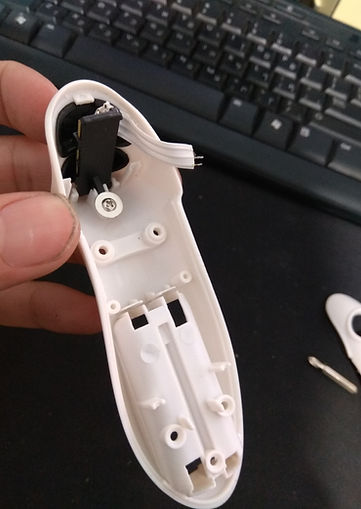
Find out which cables is grounding, upper and lower button, I did it using trial and error, I uploaded a code that use buttons to arduino and each time I changed the cables until I find out

Using the hot glue to place all 6 buttons inside the controller

Close it and connect all the exposed cables (grounding) together

Sold all grounding wires to a male jumper
Using the hot glue to place the analog joystick on top

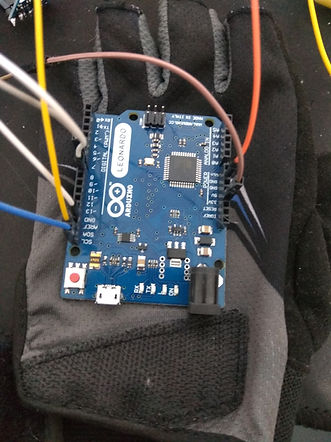
Using the hot glue to place the arduino to the glove
Place the DOF GY 521 inside the battery compartment

wired the board
4 to 13 - all the buttons, including the joystick button
SCL and SDA to the GY 521
3v to the GY 521
5v to the joystick
A0 and A1 to the joystick
The Leonardo board have 3 GND It's perfect because we need all 3
1 to all the buttons, 2 joystick , 3 GY 521
links:
arduino libraries
https://drive.google.com/open?id=1cwv-yHQYuMgBalJx0bNO9CiRHWdeUe4i
VR_controller_All_options
https://drive.google.com/open?id=16hbAh6IVLfTBy_en38kOtJ7_6XTrgOXu
VR_controller_-_need_gy_but_dont_use
https://drive.google.com/open?id=1f3n1zvNyr1m0ZjqcISGmqxdDUXMywK5Y
VR_controller_without_gy
https://drive.google.com/open?id=1FEtegb1yKQ5mqaZZT92N4XmJqEoLzB-I


Final Product
